Atlas and EPU
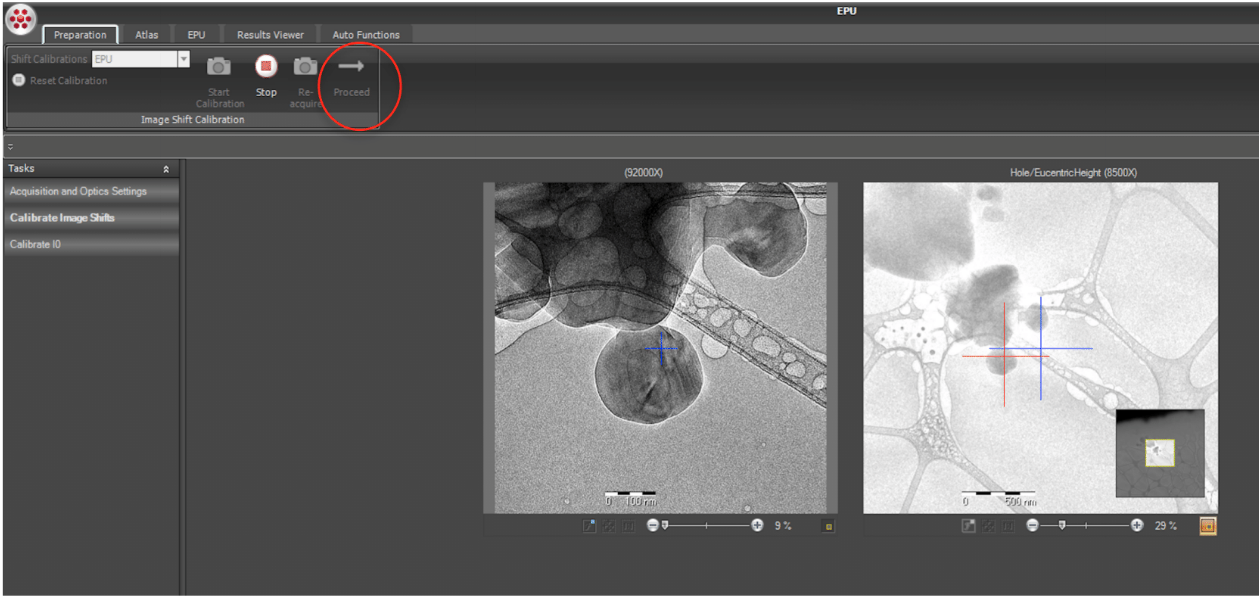
Calibrate Image shifts
Calibrate image shifts before to doing the atlas.
Find a recognizable feature in a grid-square you will not use. The feature should be large enough to spot at LM mode but also have smaller features that one can see at the Data acquisition mag. Something in the order of 2-4 um is usually good.
Bring feature to eucentric height.
Center the edge of this feature at the data acquisition magnification using the fluorescent screen center.
Bring feature in focus.
In the Preparation tab click on Image Shift calibration and then Start Calibration.
The calibration routine starts off at the Data acquisition. Press continue.
For the hole eucentric height and grid square magnifications, centre the feature via double clicking and re-acquire and if centred press continue.
Remove the aperture while collection with atlas presets, centre feature and re-acquire and if centred press continue.
At the end of the routine, the log window will say image shift calibration finished successfully.
Atlas Acquisition
Acquire an Atlas of the entire grid.
Load the atlas presets.
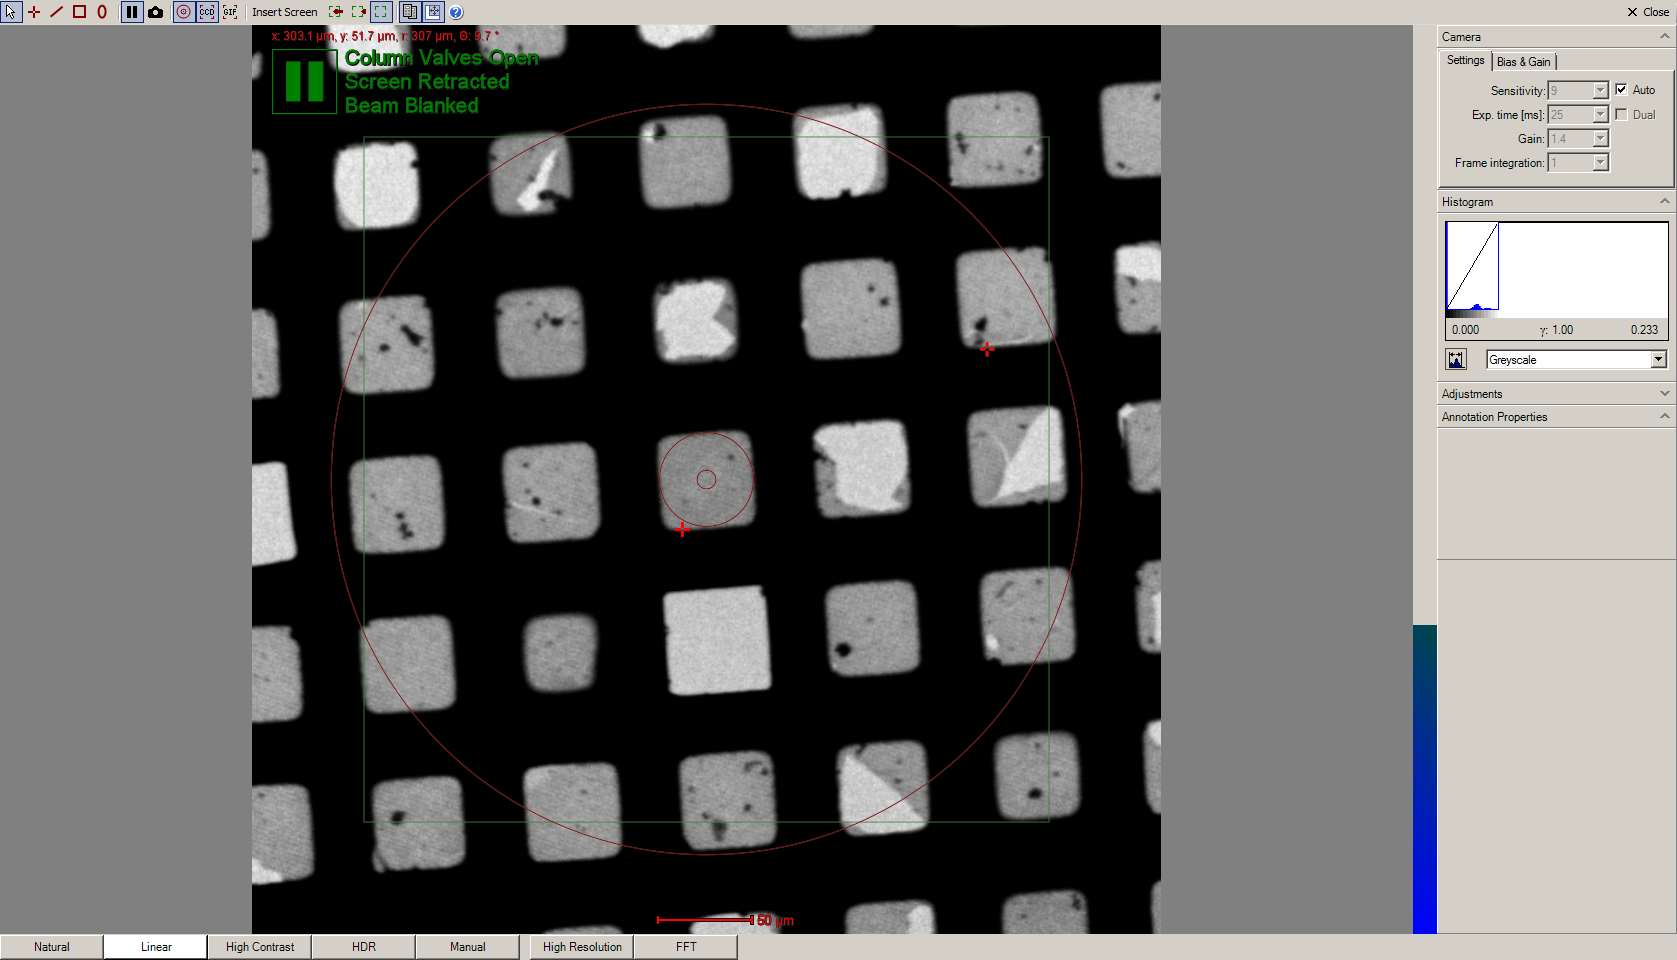
Check that the beam is centred or centre it.
Make sure you have roughly set the eucentric height of the grid and that the objective aperture is removed.
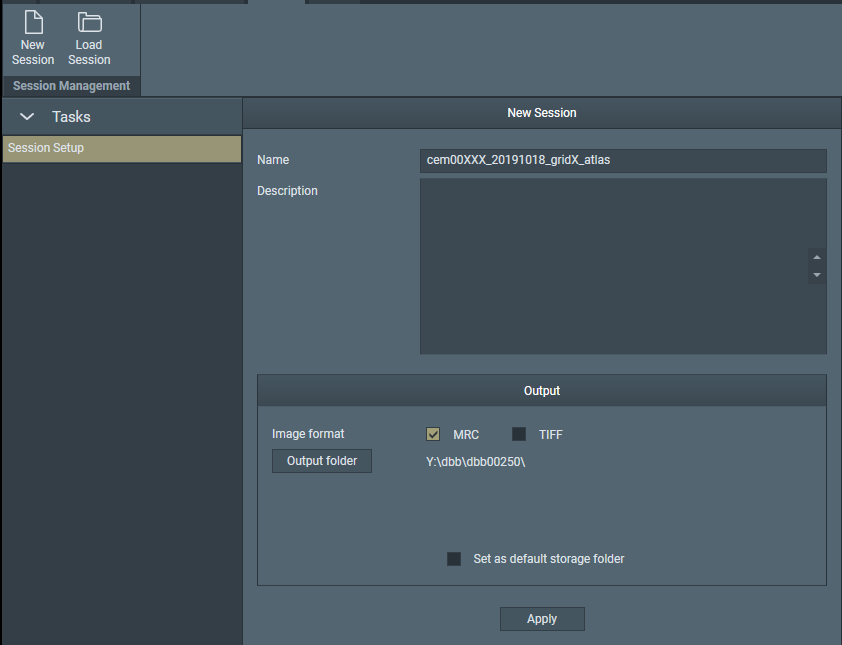
Click on Atlas and New sample.
Make sure the name is called according to your sll, dbb, or cem number that was generated via scipion, e.g. sll00214_date_gridx_atlas.
Choose the working directory that you created via scipion as the output folder.
Hit Apply.
Click on ‘Atlas Acquisition’ and ‘Acquire’ to start the Atlas.
The Atlas can be started from the centre of the grid or the current position. Atlas acquisition of the full grid takes around 20 minutes.
Set up EPU Session
Click on EPU tab and select New Session.
Make sure the name is called according to your sll, dbb, or cem number that was generated via scipion, e.g. sll00214_date_gridx_EPU.
Choose your working directory that you created via scipion as the output folder.
Acquisition mode: Use fast hole centering for faster acquisition. Use accurate hole centring, if speed is not an issue and you want to centre the holes more accurate.
Save as MRC.
Select the type of foil you are using and press apply.
Add your email and operator email in the recipents box.
Tick box: Send email on completion, etc.

Square Selection
Go to Square Selection.
Click on Unselect all.
Go to a square that you consider suitable by right-clicking and then selecting ‘Move to grid-square’ which centers the square with the stage.
Under the Preparation tab select the Grid-square condition from the drop-down menu and click ‘Set’.
Adjust eucentric height.
If the grid square is not broken (often breaks are only visible while tilting the stage), you can go back to the Square Selection in EPU and select the Grid Square by right clicking on it and then on Add.
Selected squares will be in green.
You can also see the squares more easily by opening a tile (the yellow rectangles). Right-click on a tile and click on ‘Open Tile’.
Hole Selection
Click on Hole Selection or Area Selection if you are using lacey grids followed by Acquire. This records an image of the entire square and saves the X, Y and Z coordinates, which will be used to re-visit the square during the automated acquisition process.It is important that the last image you record of the Hole Selection/Area Selection has the correct Z-height values.
Once an image is recorded click on Measure Hole Size. This results in two yellow circles connected by a line.
Drag each circle to neighboring holes and adjust the circle size to the hole size.
Click on Find Holes to allow the software to find the holes in the square.
Adjust the ice-thickness histogram to select holes. You may also enter grey-values manually and hit apply.